Installation and First Steps
1. Execute Setup.exe
2. Accept license agreement
3. Choose directory
4. Select "start menu folder"
5. Select additional tasks
6. Install application
7. Installation is processing
2 Create projects
1. Call iCon-L
2. Create new project, assign a name (here: STANDARD_PROJECT), select the type of project (HMI or Standard project)
3. Click on "Logon to target system" in the toolbar

4. Select target system (double click)
5. Signs and symbols:
| Symbol | System state |
| No connection | |
| active connection | |
| Connection not used |
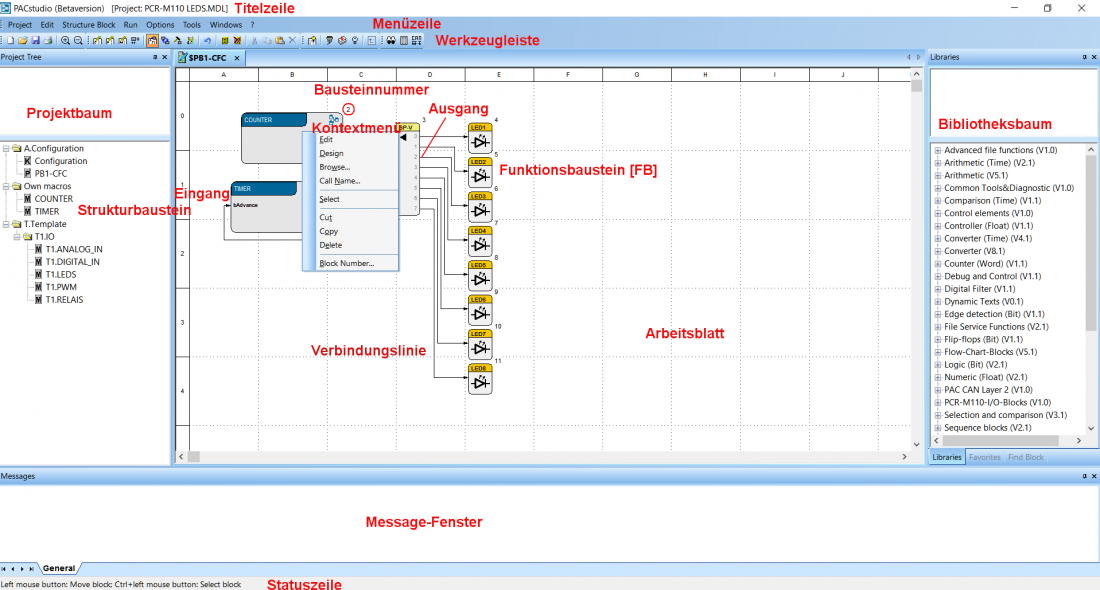
Commands can be called from the submenus, toolbar, context menu (right click) and key combination.
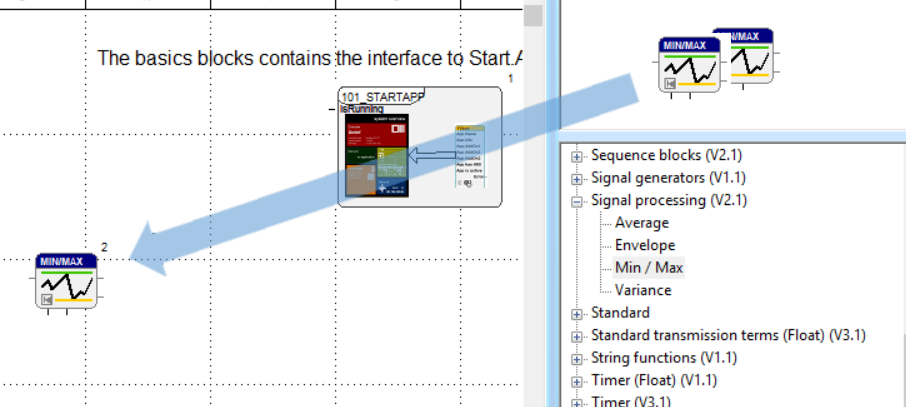
Function blocks are located on the right in the library tree and can be implemented on the worksheet by drag&drop.