Use of libraries
1 General
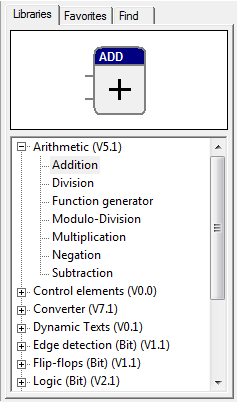
Libraries contain function blocks used in the project. Linked projects are used as structure block libraries.
By loading other libraries, the range of available functions is extended. However, it should be checked whether the new function blocks are supported by the target system.
Libraries, which are no longer required, can be deleted and older versions can be replaced by newer ones.
The commands for working with libraries are contained in the Project submenu and are explained in the following sections.
2 Load libraries
Procedure
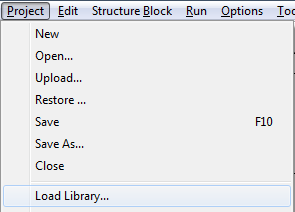
1. Call the "Load Library ..." command in the Project submenu
For loading additional libraries, the system must be in the Edit state. It might take some time to open the dialog when this command is called for the first time after loading of the project, as all library directories must be searched by the system.
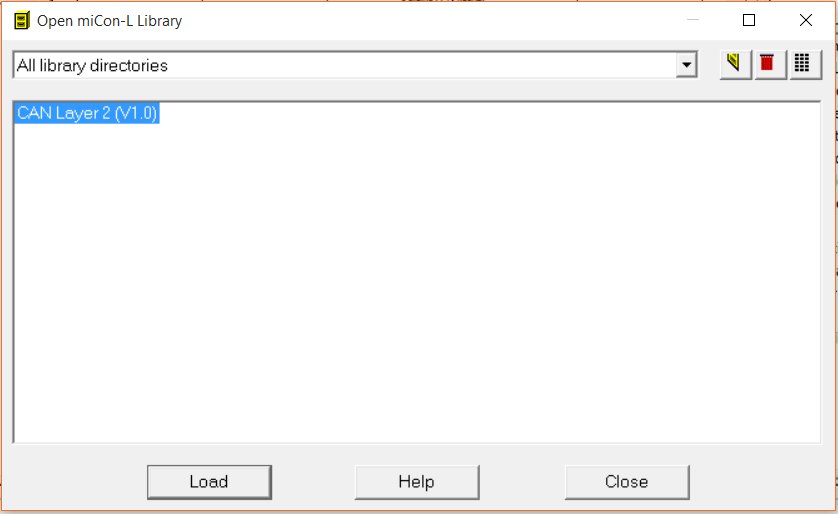
2. Select libraries
A dialog opens, indicating the libraries of all configured directories. The window may be enlarged to provide a better view on longer lists. The number of libraries listed can be changed by selecting a directory or pressing the two buttons next to the directory list. The third button provides a detailed list with columns that can be arranged as desired.
The description of a function block library can be opened by pressing the Help button. One or more libraries can be selected in the dialog.
3. Use libraries
After confirming the selection by pressing OK, the libraries are loaded. The blocks can be inserted in the project via the library tree.
3 Replace library
This command is used to replace obsolete libraries by newer versions. Not only the relevant libraries, but also the associated blocks in the project are replaced.
Procedure
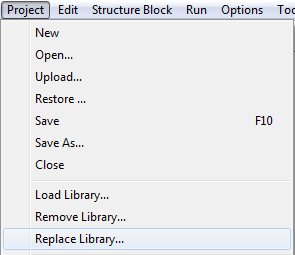
1. Call the "Replace Library ..." command in the Project submenu
To replace libraries, the system must be in the Edit state.
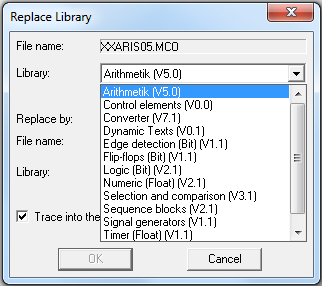
2. Select the obsolete library
A dialog opens which contains a drop-down list with the loaded libraries (function block libraries and linked projects). Select the obsolete library from this list.
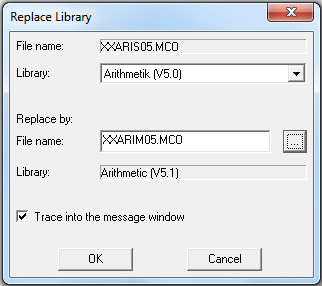
3. Select a new library
Enter the file name of the new library in the input field. Using the … button, a dialog opens, which indicates all libraries of the configured directories and facilitates easier selection. The library selection dialog is used in the same way as for loading libraries. Upon confirming the selected library by pressing OK, its file name is shown in the input field.
Also loaded libraries can be selected, i.e. libraries which are already used by another library, however not yet direct by the project.
4. Replace a library
The new library is loaded upon pressing the Replace button; blocks of the old library are replaced by the blocks of the new library and the old library is removed. A warning is generated in case that the new library is already loaded.
If the "Trace into the message window" button is activated, replacement of blocks will be traced in this window. In particular, messages for PARAMETER and LOCALPARA values indicate problems, if any, in copying block parameters. It might be necessary to enter new parameters if the message "Block was changed (No take-over)" is displayed.
If not all blocks could be replaced as the new library does not contain all blocks required or the old library was divided, the old library remains loaded to facilitate future replacement.
5. Close the dialog
Thereafter, other libraries can be replaced or the dialog can be closed by pressing the button of the same name.
Libraries used by other loaded libraries cannot be replaced. Resolve their dependency on other libraries first.
4 Remove libraries
Procedure
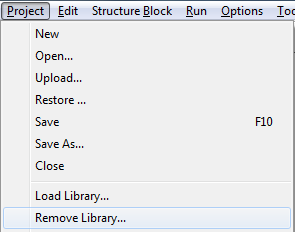
1. Call the "Remove Library ..." command in the Project submenu
To remove libraries, the system must be in edit mode.
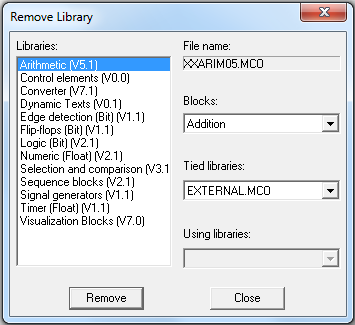
2. Select a library
A dialog opens, listing the libraries loaded. Additional information is provided when the desired library is selected. Drop-down list fields indicate the contained blocks, the libraries incorporated in the selected library, and libraries using the selected library. Libraries used by others cannot be deleted.
3. Remove a library
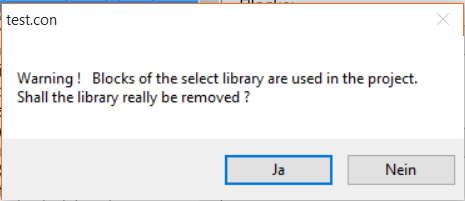
A library is deleted from the project by pressing the Remove button or by double-clicking on the entry in the library list. If blocks of the library are used in the project, a warning is displayed and the process may be cancelled. If the deletion of the library is continued, the command automatically removes all blocks of the library from the project.
4. Close the dialog
Now, other libraries may be removed or the dialog be closed by pressing the button of the same name.
To remove system libraries, the REMOVE SYSLIB=ON switch in the [SYSTEM] section of the main configuration file (ICON.INI) needs to be set before calling the dialog.