Handle projects
1 General
Projects consist of several files and are mainly stored in separate directories. For file operations the system resorts to a main file with the extension MDL, where all defined structure blocks, settings and instance parameters are stored.
When PACstudio is started, a project is not yet loaded. To work with the system, a new project must be created or an existing project loaded.
Edited projects can be saved under the same name or under any other name if the user elects to create another version or a backup copy.
After completion of work projects can be closed.
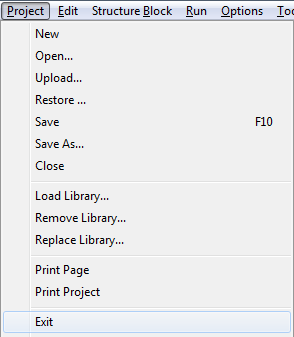
The commands for the above file operations are contained in the Project Submenu. They are described in more detail later in this manual.
2 Create new project
Procedure
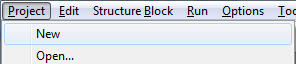
1. Call the "New" command in the Project submenu
If the system is in the Online Observation state, switch it offline first. Any loaded projects are closed when this command is called.
Select a project template
A dialog opens with a list on the left containing several templates for various applications and devices. Choose an appropriate template for the new project.
Enter the project name
Enter a name for the new project in the input field on the right. The field below indicates a target directory. While the name is entered, a subdirectory of the same name is created there. After the name has been entered, the target directory can be altered in the edit field or in the selection dialog upon pressing the ... button.
Edit the project
After a template has been selected and a name entered, the dialog can be closed by pressing OK. The project is created by copying and renaming the template, and opened thereafter. The project tree indicates the structure blocks, and the library tree contains the available function blocks. Now you can start to edit the project.
3 Project template
iCon-L templates are model projects which, depending on their definition, may contain specific libraries, macros, and basic settings for communication with the target system or for simulation and/or parts of the program.
For iCon-L the following templates are available by default:
Standard project:
![]()
This type of projects is, like the name implies, the default version, used in most of the occasions. The whole range of general function blocks is available. The interaction of the user with the program will be done by online observation. To test the project the standard simulation is available.
HMI project:
![]()
HMI is the abbreviation for Human-Machine-Interface. This type of projects is selected, if the interaction of the user with the program is done via an external, graphical control panel (e.g. a touch screen). In this case a mask-designer is provided to design a user interface. Besides the general function blocks specific block for HMI use are loaded. To test the project a HMI simulation is provided.
Create new templates
A template may be created by following procedure below:
- Create a new project. Select the test.con directory TEMPLATE as the target location in the file selection dialog.
- Delete any library not intended for the template.
- Special libraries may be added.
- Macros can be predefined.
- etc.
Save the project in the state you wish to open the new project when using this template.
It hast to be noted, that the data base file has to be copied from the database directory of the project into the template directory and the database directory has to be deleted. It is recommended to use an empty data base file (.FDB) from another template.
To create a working template some files have to be adjusted.
- In the configuration file "peojectname.FDBCFG" the newly assigned values have to be deleted (compare content with existing files from other templates o directly copy an empty configuration file from another template)
- If necessary, edit the "project name".IWS file of the project template (e.g. enter project-specific library paths).
- In the file Templates001.xml the new template and any new system have to be inserted and the correlation between the new template and its system has to be made. The validity of this file can be checked against Templates001.dtd. this test can be done by an appropiat eXML tool.
If you create a new project now, the system will offer you the created template for selection.
4 Load project
Procedure
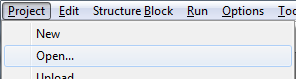
1. Call the "Open ..." command in the Project submenu
If the system is in the Online Observation state, it must be switched offline first. Any loaded projects are closed when this command is called.
2. Select a project file
A selection dialog opens, indicating project files with the extension MDL. In addition, you can change the current directory here.
3. Edit the project
After the file has been selected and confirmed by Open, the project is loaded. During the loading process the project's state prior to the last saving operation is restored. Now you can continue editing the project.
At the end of the Project submenu a list is displayed with the last five projects loaded. If selected, any of these files is loaded immediately.
Import Projects
An import script has been added to ease the adaptation of existing projects to new versions of the programming system. This script is executed when version differences have been found during loading or restoring a project.
If a difference between the project to load and the currently used version of the development environment is found, the user will be ask, if an import should be executed.
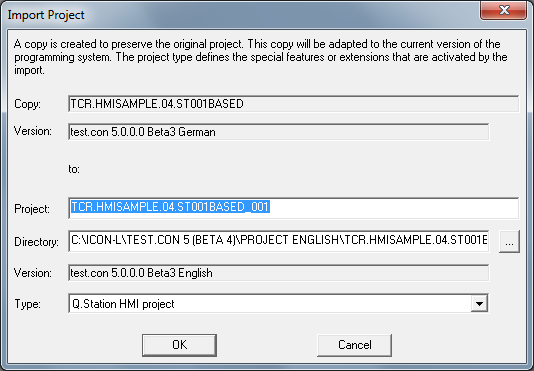
The import is started with the “Yes”-button in the message box. First the dialog with the import settings is opened.
The original project shall not be changed by the project import. Therefore the destination directory and the name of a project copy need to be entered when opening a project. A destination directory is also needed for the restore. There the project is rebuilt. The import script is able to manage different project types that include for example different extensions or libraries. The project type is selected in a drop-list-field in the dialog.
The execution of the project import will create of copy files and directories based on the template of the selected project type. The used libraries will be updated by replacing or removing the old version and loading the new version. If the replacement of existing libraries is seen as problematic, these libraries had not been included in the import process and will remain in its old version. In the end unused system libraries are removed and the project is saved.
A log-file is written during the import. It is saved in the project directory and has the extension PROJECT-IMPORT-LOG. After the import the content of the log-file is displayed in the message window under the tabulator “Project Import”.
The project import is based in a script. This can be adapted and changed by the user for additional operations.
5 Upload Project (Backannotation)
In addition to the normal download the script-based restore information for the current project can be written into the target system. Afterwards the up-to-date version of the project running in a device can be accessed by simply uploading this information and executing it.
The restore information is compressed before the download. Furthermore the information can be encrypted with a password to protect it. The dialog for the backannotation password settings is opened with the “Backannotation” command in the Options submenu.
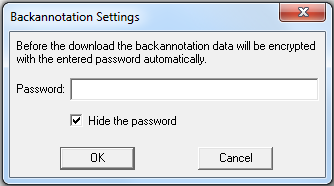
The visibility of the entered text is controlled by the checkbox “Hide the password”. Like most of the other configuration parameters the password is saved to a project-specific file and can be displayed and changed anytime with help of the dialog above. When no password is entered or the text in the edit field is deleted the restore information will be downloaded after that without any encryption.
Procedure
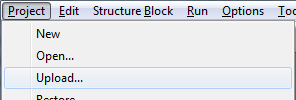
1. Call the "Upload ..." command in the Project submenu
If the system is in the Online Observation state, switch it offline first. Currently open projects will be closed after calling this command.
2. Connect to target system
To be able to upload the project the system has to be connected to the target system. If the restore information is encrypted a password has to be provided.
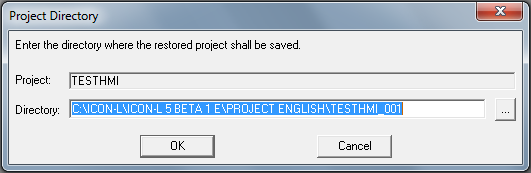
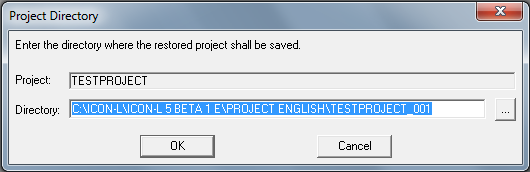
3. Selection of the new project directory
Before executing the restore script the project directory needs to be entered. There the uploaded project will be saved. Any directory can be provided, but an empty folder is needed and it must not be an existing project. To simplify the input a subdirectory with the project name and a possible numbering is suggested within the configured base directory for the projects.
4. Recreation of the project
After selecting the directory the currently running project from the target system will be restored. The used structure blocks are created and the function blocks are inserted, connected, and get their parameters. Finally the saved configuration files are copied to the project directory. The project can now be edited within test.con.
The backannotation can be customized by the user by several configuration settings.
6 Restore project
Every time a project is saved, a list with all the needed information to redraw the whole project is generated. This list is stored in a text file and packed together with other project files. The archive is named like the project plus a serial index and is filed in a subdirectory of the project. The number of archives can be adjusted over a configuration switch.
To restore a project the command with the same name in the project menu must be called.
Procedure
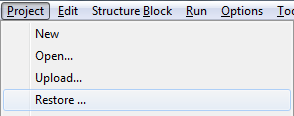
1. Call the "Restore ..." command in the Project submenu
If the system is in the Online Observation state, switch it offline first. Currently open projects will be closed after calling this command.
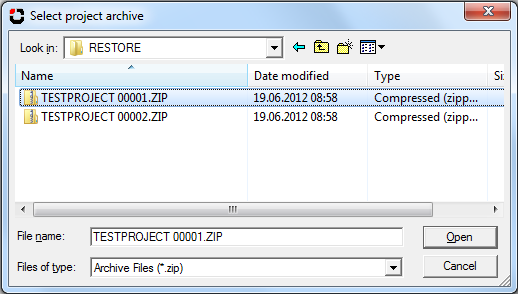
2. Select a project archive
All available archives are shown in the opened dialog
3. Selection of the project directory
After selecting, the archive a dialog will be shown to input a new project directory. It must be different from the currently used directory.
4. Restore the project
After selecting the archive file and entering the project path a new empty project is created and the archived instruction list is executed. The work on the project can be continued from that saved point.
7 Save project
An open project can be saved under the same name or any other name.
Procedure (saving a project under the same name):
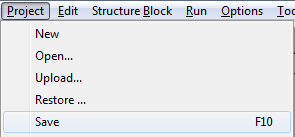
1. Call the "Save" command in the Project submenu
If the system is in the Online Observation state, switch it offline first. Existing files are overwritten.
Using the F10 key the project will also be saved.
2. Continue or terminate editing
Upon saving, the project is still open. It can be further edited or closed.
Procedure (saving a project under another name)
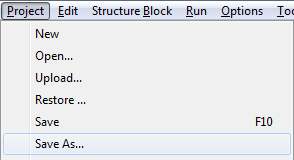
1. Call the "Save As ..." command in the Project submenu
If the system is in the Online Observation state, switch it offline first.
2. Enter the project name
A standard dialog opens where the name of the new project file can be entered. You can also select an existing file. In addition, it is possible to change to another target directory.
3. Continue or terminate editing
Upon confirming the entry by "Save", the dialog is closed. A warning is displayed that existing project files are overwritten. Thereafter, any project data and current settings are saved. After saving, all operations are carried out in the newly created project.
In addition to created drawings and entered data, also the current state of the system and of the user interface is stored when projects are saved. This also includes, for instance, any opened worksheet window and relating settings.
Saving does not include all files of the project. Configuration files for communication and bit maps are not written. This should be taken into consideration when changing to another target directory.
Before overwriting an existing project file will be saved with the extension MD~. It may be used as backup.
8 Close project
Procedure
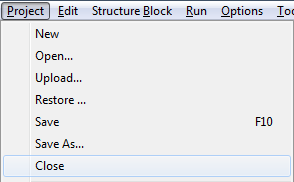
1. Call the "Close" command in the Project submenu
If the system is in the Online Observation state, switch it offline first. Before the project is closed, the system might ask whether changes should be saved.
2. Open another project or quit work with PACstudio
After closing, the system is in the No Project state. By using the commands in the Project submenu, other files may be opened or PACstudio may be closed now.
To quit work, it is not necessary to close the project. The Exit command automatically closes any opened project.