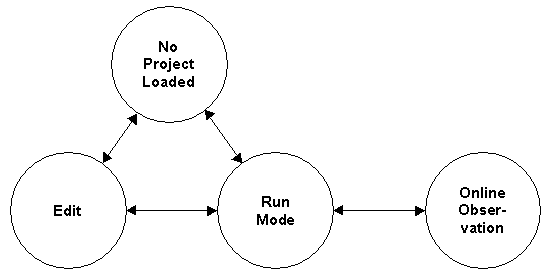
System states
1 General
Creating, changing, testing and running projects by using one tool only
The program distinguishes between the following system states.
2 No project loaded
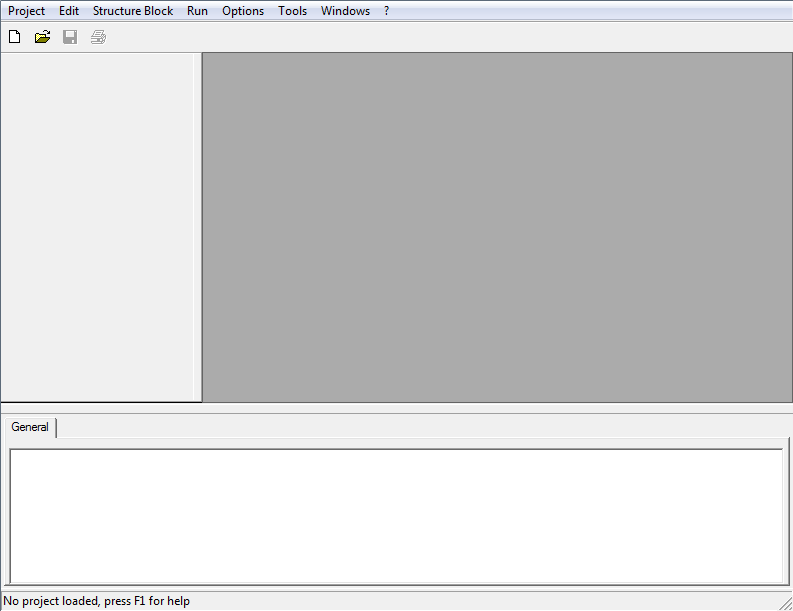
When the system is started without any command line parameter included, it is in the state of "No project loaded". The main screen title bar just displays the name and the version of the programming system. Most of the menu items are deactivated in this state.
Only commands for creating and loading projects are available in the Project Submenu. Upon calling one of these commands, a project is opened and the stored system state (edit or run mode) of that project is recovered. As an indication for leaving the start state, the title bar displays the name of the project behind the system's identification. By using the Close command in the Project submenu the system returns to "No project loaded". Returning to this state is not required to quit work.
3 Edit mode
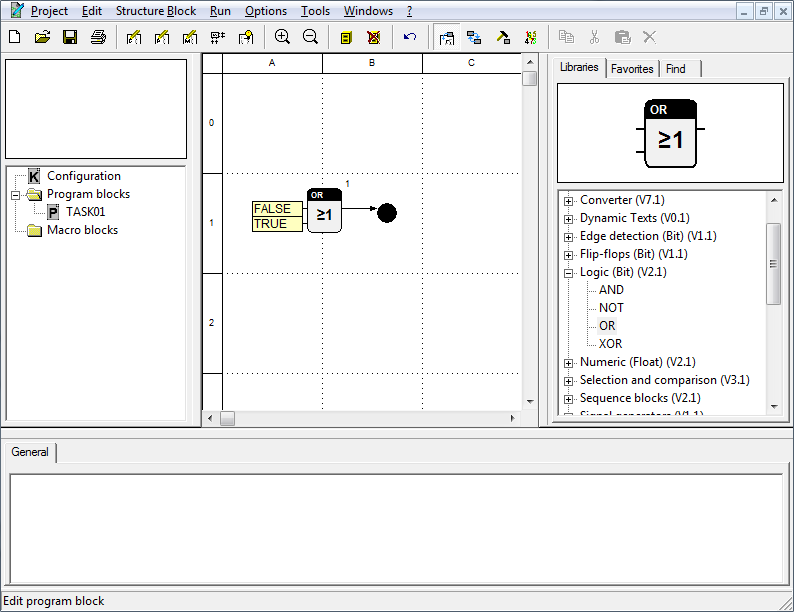
"Edit" is the basic state of the system. It is the state in which the work on a project is mainly fulfilled. The structure of a project is determined by loading and removing libraries, defining and deleting structure blocks, and inserting, removing and connecting blocks. In edit mode the classes of structure blocks are processed. The values entered in the parameter dialogs of the blocks only serve as presettings for the instances visible in run mode.
Upon selecting one of the first three commands of the Edit menu or closing all work sheet windows, the system changes to "Edit" state. This state can be easily identified through the library tree. It is only available in the "Edit" state. In addition, the grid for block positions and connections are indicated by means of dotted lines in the work sheet windows.
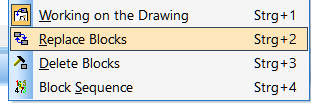
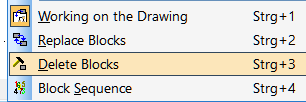
There are four modes available to access the various editing functions. They can be opened from the Edit submenu or by using the toolbar.
Working on the Drawing
"Working on the Drawing" is the main editing mode. Almost all functions for editing a project are available here. When the system is changed from another state to Edit, it automatically assumes this mode. Main functions, such as inserting and relocating blocks or drawing and sorting connections can be executed by simply clicking the left mouse button. These functions are flagged by the cursor form and the status bar text when the smart pointer is activated. Other functions for the object under the cursor may be called from context menus.
Selecting blocks and performing related group and clipboard operations are only possible in the "Working on the Drawing" mode.
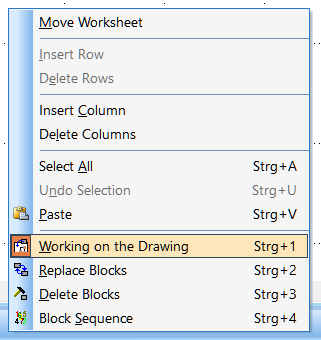
Replace Blocks
This mode facilitates replacing of single blocks. To replace a block, the block symbol is dragged from the block window in the project or library tree using the mouse and released on the block to be replaced. In doing this the old block is deleted and the new block is inserted. If the names and the signal data types of the labels are identical, connections are preserved and are just newly routed.
Delete Blocks
Upon changing to the "Delete Blocks" mode, the cursor assumes the form of a hammer. A block can be deleted by clicking with the left mouse button on it. In addition, all connections to this block are removed from the project.
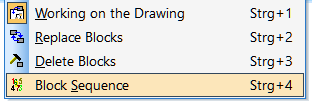
Block Sequence
In the "Block Sequence" mode the cursor assumes the form of an arrow indicating the clockwise direction. When clicking with the left mouse button on a block featuring a number in the right upper corner, this number is set to 1 and highlighted. When clicking on other blocks thereafter, their numbers increase by 1 each. The number of the block manipulated last is always highlighted. Hence, it is easy to conclude the next number. The dialog for entering a block number is opened by pressing the right mouse button. Once a value has been entered, it also determines the subsequent numbers defined by pressing the left mouse button.
Numbers serve to determine the working sequence of blocks and the priority of assigned tasks (also refer to Working Sequence, Priority and Cycletime).
Beside from the operations described above, i.e. inserting and deleting objects, also the structure block design (Design Structure Block) can be called. From a specific work sheet window and by means of an additional toolbar, label positions, the appearance of symbols and the presentation in the work sheet window can be changed.
4 Run mode
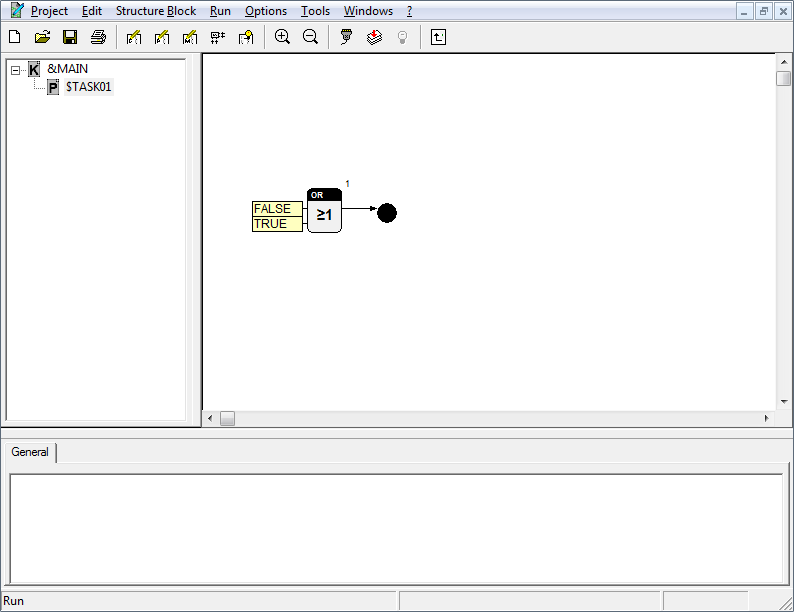
The system changes from the Edit to the Run mode when using the Enter command from the Run submenu. During this changeover it performs an instantiation. Instances are formed from the classes inserted during editing operations (refer to Classes and Instances).
When this option is chosen, a new worksheet window is opened, showing the configuration. In contrast to the worksheet windows in the Edit mode, the worksheet windows in the Run mode do not contain a grid. The project tree offers a view, presenting the hierarchic structure of the project. This can be used to easily change between the different project levels. The command "Upward" also offers the possibility to change to the next higher project level.
The Run mode is used to assign instance parameters used by the blocks later in the target system. Commands for importing and exporting parameter files (refer to the submenus Structure Block and Run) support this work. By assigning instance names, it is easier to differentiate between identical structure blocks with different instance parameters.
In addition, cycle times of tasks can be defined. In the Run mode structural changes of the project are no longer possible. That is why the library tree is no longer available.
The other commands in the Run submenu serve to start simulation, establish target system connections as well as to create, load and start the program and change to online observation.
5 Online observation (Basics)
When a program has been successfully loaded into simulation or a selected target system, online observation starts automatically. For changing directly from the Run mode without performing a download beforehand, the Online command in the Run submenu is used.
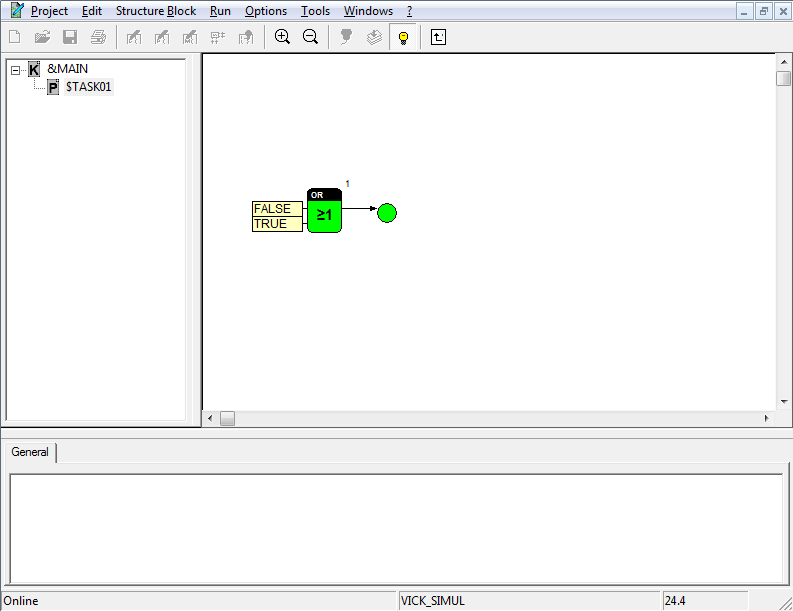
For online observation the visualization blocks display the current values of connected signals. The status bar shows the current target system time in addition to the designation of the target system. Clicking the connecting lines with the left mouse button opens a window displaying the current signal value. Via parameter blocks and signal editors (refer to Connections) values may be typed online into the target system. However, they only influence the volatile memory (RAM). For transferring the values into the nonvolatile memory of the target system (if available), the Parameter command in the Logon Target System dialog is used.
The refresh rate of value representation can be defined in the Work Sheet Settings dialog (refer to Options Submenu). The online observation can be left by using the Offline command (refer to Run Submenu) or by exiting test.con.